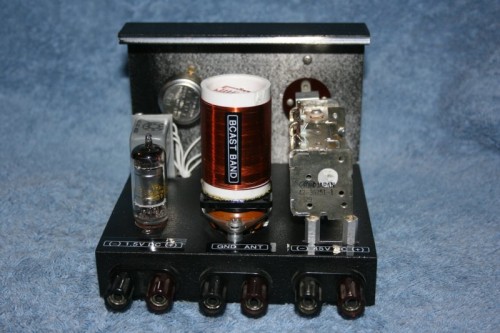
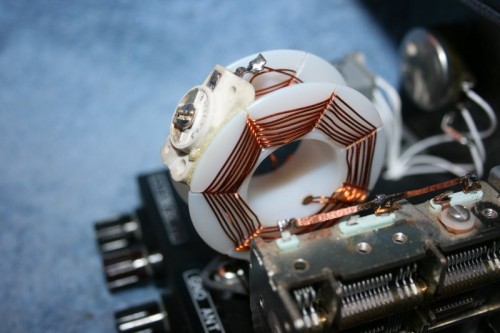
Thanks to Pete Friedrichs for sending in his Pipsqueak Receiver Build. I love the fact that it has been built from parts scavenged out of his junk box. At first glance I would not have guessed that it was built from junk since it has a nice kit look to it. I have never seen a spiderweb coil before, it looks absolutely fantastic. I should add one to my next project and just have it there for looks, a blue LED backlight would certainly enhance the efficiency of the coil. You need to have a look at the build log since it is very well done and full of great details. If you are wanting to make your own Pipsqueak Receiver there is certainly enough details to do so.
“The Pipsqueak’s chassis is made from aluminum scrap. It began life as the housing of a discarded industrial instrument. The housing was composed of two C-shaped aluminum extrusions, which together, formed the top, bottom, and sides of the instrument. When the instrument was discarded the extrusions were saved. One extrusion became the chassis, the other the front panel. Needless to say, some work with a saw was required to encourage a cooperative fit. The front panel is secured to the chassis with a couple of 6-32 screws, lockwashers, and nuts.I have experimented with the construction of other coils in the Pipsqueak, primarily for use at shortwave frequencies. At shortwave frequencies, single-layer coils can pose problems because of the parasitic capacitance that is present between adjacent windings. While techniques can be used to introduce space between windings, I’ve had good luck with so-called “spiderweb” coils, because the way in which they are wound reduces this parasitic effect. I had never seen anyone use spiderweb coils in a plug-in format, but I figured I give it a shake.”


