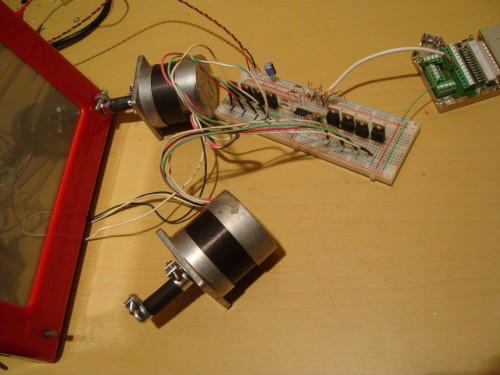
This Step-a-Sketch project is sure to bring back some memories if you are around my age. I remember having one of these growing up, I think I got it for a Christmas present one year. Unfortunately it was killed when I was going through my how does this work phase. Almost everything with screws around me got taken apart, some were even put back successfully. By using a PIC 16f84a microcontroller tied to a home made unipolar stepper driver Chris from Powered By Nerd was able to allow a computer is able to send CNC pulse data to the PIC and the PIC then controls the stepper motors to draw a 2D image on the Etch a Sketch. We have seen a similar project before and the same project in reverse, something about a toy from my childhood brought to life with modern electronics that is a pleasure to see. If you want to build one for yourself Chris has provided the code and schematic to give you a head start.
Thanks for the tip Jeff.
“This code works fine, but it would need some work before it’s connected to an industrial machine. The most glaring problem is that the PIC will not take the same amount of time to execute the code every pass through the program, due to whether or not one or both of the motors have been instructed to move. This could also account for some of the hesitation I occasionally see. An easy solution to this would be to add delay loops into the code, when no real work needs to be done.”


Permalink
Awesome idea, but no need to try to reinvent the wheel when it comes to computer control.
You can save all the timing issues by simply using a dedicated CNC control port. They exist and have for years, its called a parallel port, or a $10 card if you don’t already have one on your box. They were originally designed specifically to run CNC apps, as even the old line printers in days of yore were dumb devices with steppers and servos, and running them was a direct CNC motion control app in a very real sense of the word.
There is a reason they were designed the way they were – they aren’t fast, but they easily interface with hardware and remove the timing issues seen here as well as others.
The hardware to do what you want is available, and industrial lathes and mills and the like have been controlled by these methods for years. No need to go and reinvent this. You may have a new application, but the underlying concept is decades old and very well supported already!
Permalink
Jeez, the old F84s are still for sale eh? I stopped using them about a week after I got into microcontrollers and electronics!
If you guys are reading this, check out the 16F88, although I’m sure you must have heard of it before. Its a far better chip to work with, any of the pins can be used as GPIOs (16 of its total 18 pins!), including the OSC1 and OSC2 pins if you use the very good internal oscillator (speaking from experience), its got loads more memory, and a whole suite of built in peripherals, ADC/PWM/I2C/SPI etc etc etc.
Literally, switching to the 16F88 is no more complicated than setting a few more fuses in the chip than for the f84, disabling the built in peripherals if you want to use all the pins for GPIO, its really simple even I could do it! 😉
Permalink
Stunmonkey: I used the Parallel Port. If you check out the original article at http://www.poweredbynerd.com you will see my whole writeup.
Stu: As the original article states, I used what I had on hand. I bought those pics around 10 years ago when I was first trying to get into microcontrollers but life got in the way and I never got off the ground.
There is a LOT of room for improvement on this project for sure, but by publishing it, I have become a lot more motivated.
Thanks for the feedback.